![]()
Django Ledger
A Double Entry Accounting Engine for Django
Django Ledger is a powerful financial management system built on the Django Web Framework. It offers a simplified API for handling complex accounting tasks in financially driven applications.
Created and developed by Miguel Sanda.
FREE Get Started Guide | Join our Discord | Documentation | QuickStart Notebook
Key Features
High-level API
Double entry accounting
Hierarchical Chart of Accounts
Financial statements (Income Statement, Balance Sheet, Cash Flow)
Purchase Orders, Sales Orders, Bills, and Invoices
Financial ratio calculations
Multi-tenancy support
Ledgers, Journal Entries & Transactions
OFX & QFX file import
Closing Entries
Inventory management
Unit of Measures
Bank account information
Django Admin integration
Built-in Entity Management UI
Getting Involved
All pull requests are welcome, as long as they address bugfixes, enhancements, new ideas, or add value to the project in any shape or form.
Please refrain from submitting pull requests that focus solely on code linting, auto-generated code, refactoring, or similar cosmetic non-value add changes.
Feature Requests/Bug Reports: Open an issue in the repository
For software customization, advanced features and consulting services: Contact us or email msanda@arrobalytics.com
Contribute: See our contribution guidelines
Who Should Contribute?
We’re looking for contributors with:
Python and Django programming skills
Finance and accounting expertise
Interest in developing a robust accounting engine API
If you have relevant experience, especially in accounting, we welcome your pull requests or direct contact.
Installation
Django Ledger is a Django application. If you haven’t, you need working knowledge of Django and a working Django project before you can use Django Ledger. A good place to start is here.
Make sure you refer to the django version you are using.
The easiest way to start is to use the zero-config Django Ledger starter template. See details here. Otherwise, you may create your project from scratch.
Adding Django Ledger to an existing project.
Add django_ledger to INSTALLED_APPS in you new Django Project.
INSTALLED_APPS = [
    ...,
    'django_ledger',
    ...,
]
Add Django Ledger Context Preprocessor
TEMPLATES = [
    {
        'OPTIONS': {
            'context_processors': [
                '...',
                'django_ledger.context.django_ledger_context'  # Add this line to a context_processors list..
            ],
        },
    },
]
Perform database migrations:
python manage.py migrate
Add URLs to your project’s urls.py:
from django.urls import include, path

urlpatterns = [
    ...,
    path('ledger/', include('django_ledger.urls', namespace='django_ledger')),
    ...,
]
Run your project:
python manage.py runserver
Navigate to Django Ledger root view assigned in your project urlpatterns setting ( typically http://127.0.0.1:8000/ledger if you followed this installation guide).
Use your superuser credentials to login.
Deprecated behavior setting (v0.8.0+)
Starting with version v0.8.0, Django Ledger introduces the DJANGO_LEDGER_USE_DEPRECATED_BEHAVIOR setting to control access to deprecated features and legacy behaviors.
Default: False (deprecated features are disabled by default)
To temporarily keep using deprecated features while you transition, set this to True in your Django settings.
Setting Up Django Ledger for Development
Django Ledger comes with a basic development environment already configured under dev_env/ folder not to be used for production environments. If you want to contribute to the project perform the following steps:
Navigate to your projects directory.
Clone the repo from github and CD into project.
git clone https://github.com/arrobalytics/django-ledger.git && cd django-ledger
Install PipEnv, if not already installed:
pip install -U pipenv
Create virtual environment.
pipenv install
If using a specific version of Python you may specify the path.
pipenv install --python PATH_TO_INTERPRETER
Activate environment.
pipenv shell
Apply migrations.
python manage.py migrate
Create a Development Django user.
python manage.py createsuperuser
Run development server.
python manage.py runserver
How To Set Up Django Ledger for Development using Docker
Navigate to your projects directory.
Give executable permissions to entrypoint.sh
sudo chmod +x entrypoint.sh
Add host ‘0.0.0.0’ into ALLOWED_HOSTS in settings.py.
Build the image and run the container.
docker compose up --build
Add Django Superuser by running command in seprate terminal
docker ps
Select container id of running container and execute following command
docker exec -it containerId /bin/sh
python manage.py createsuperuser
Navigate to http://0.0.0.0:8000/ on browser.
Run Test Suite
After setting up your development environment you may run tests.
python manage.py test django_ledger
Screenshots

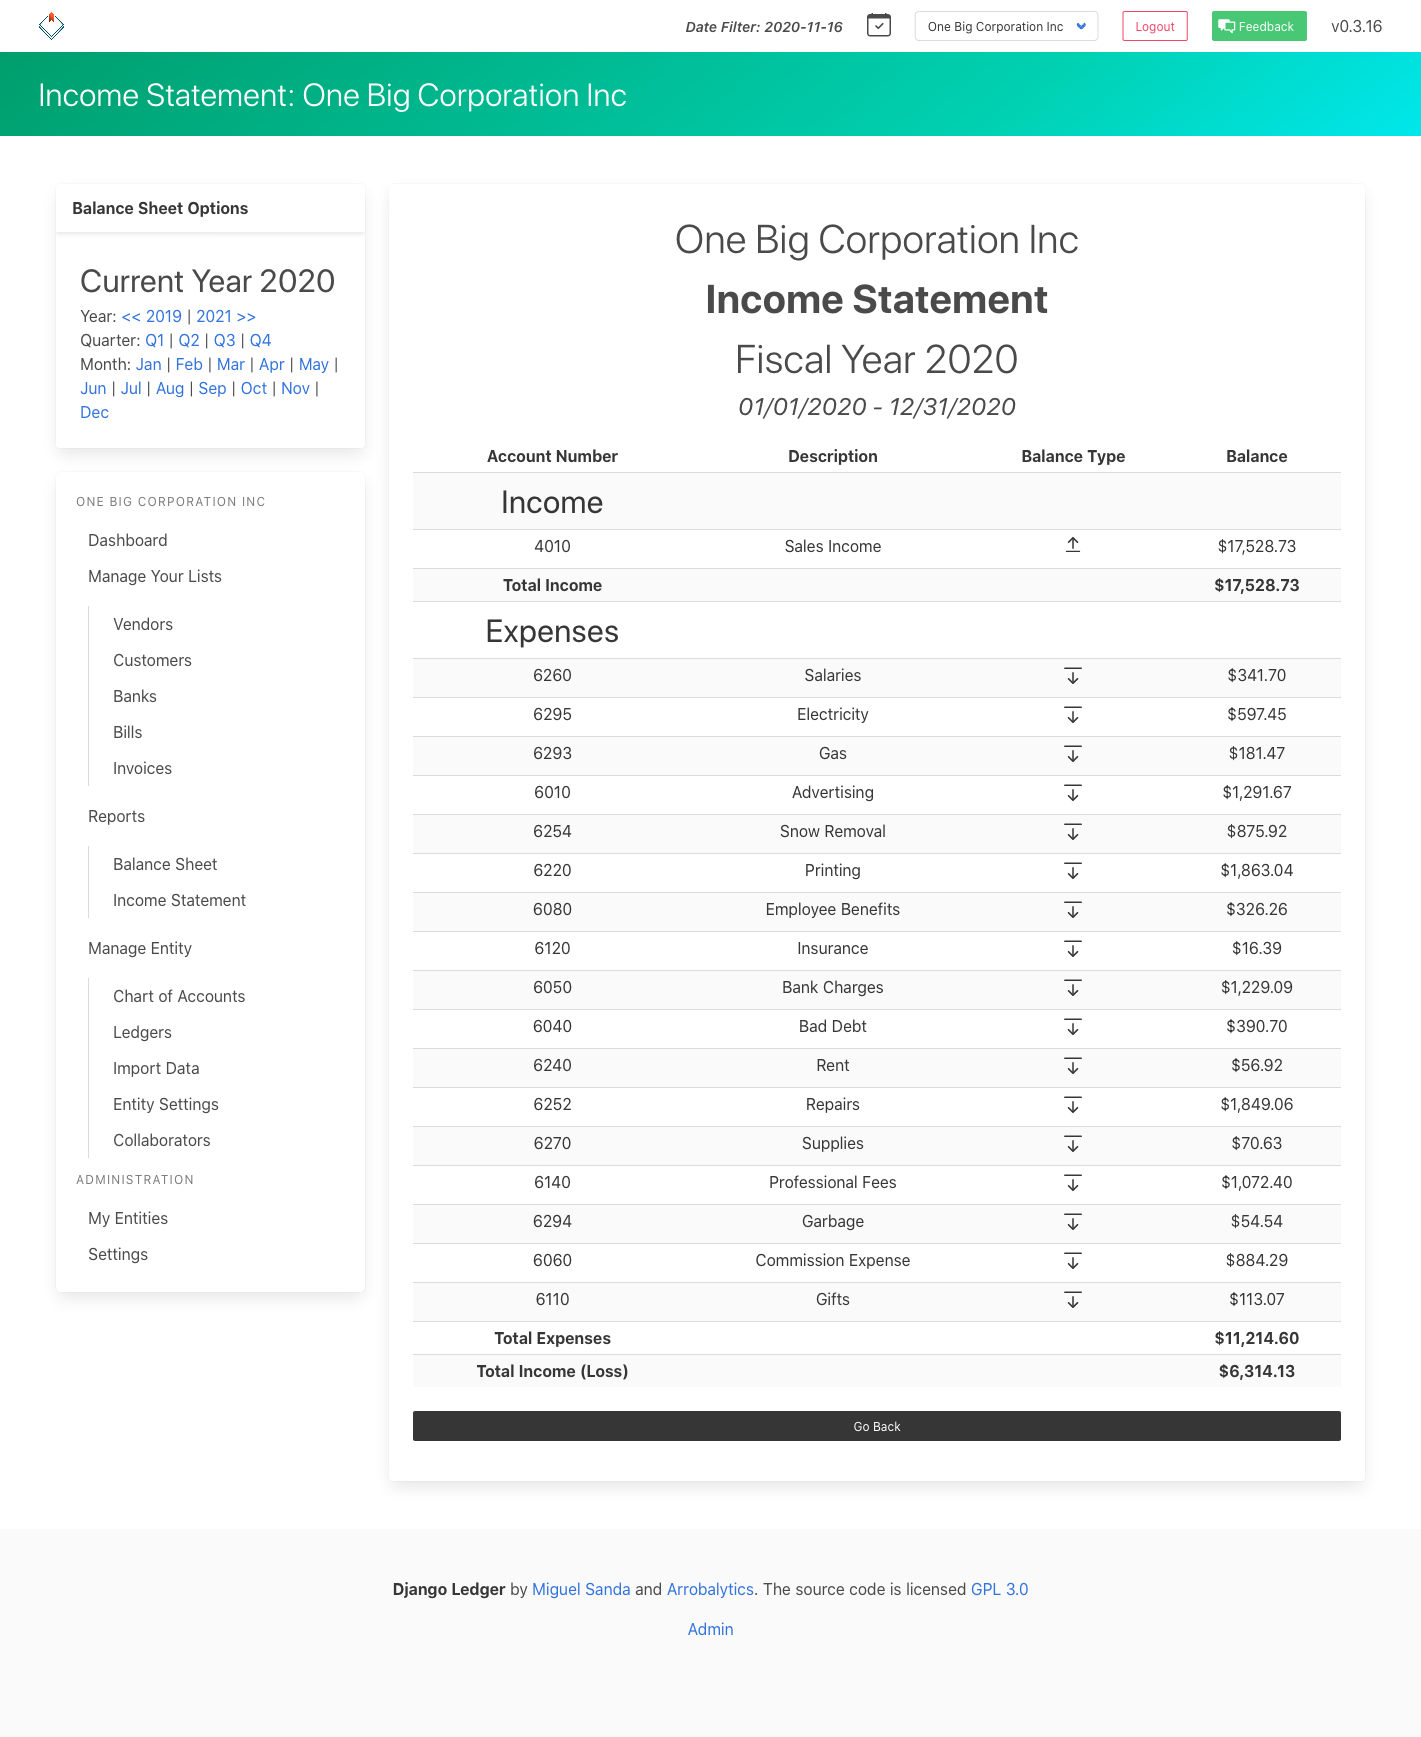
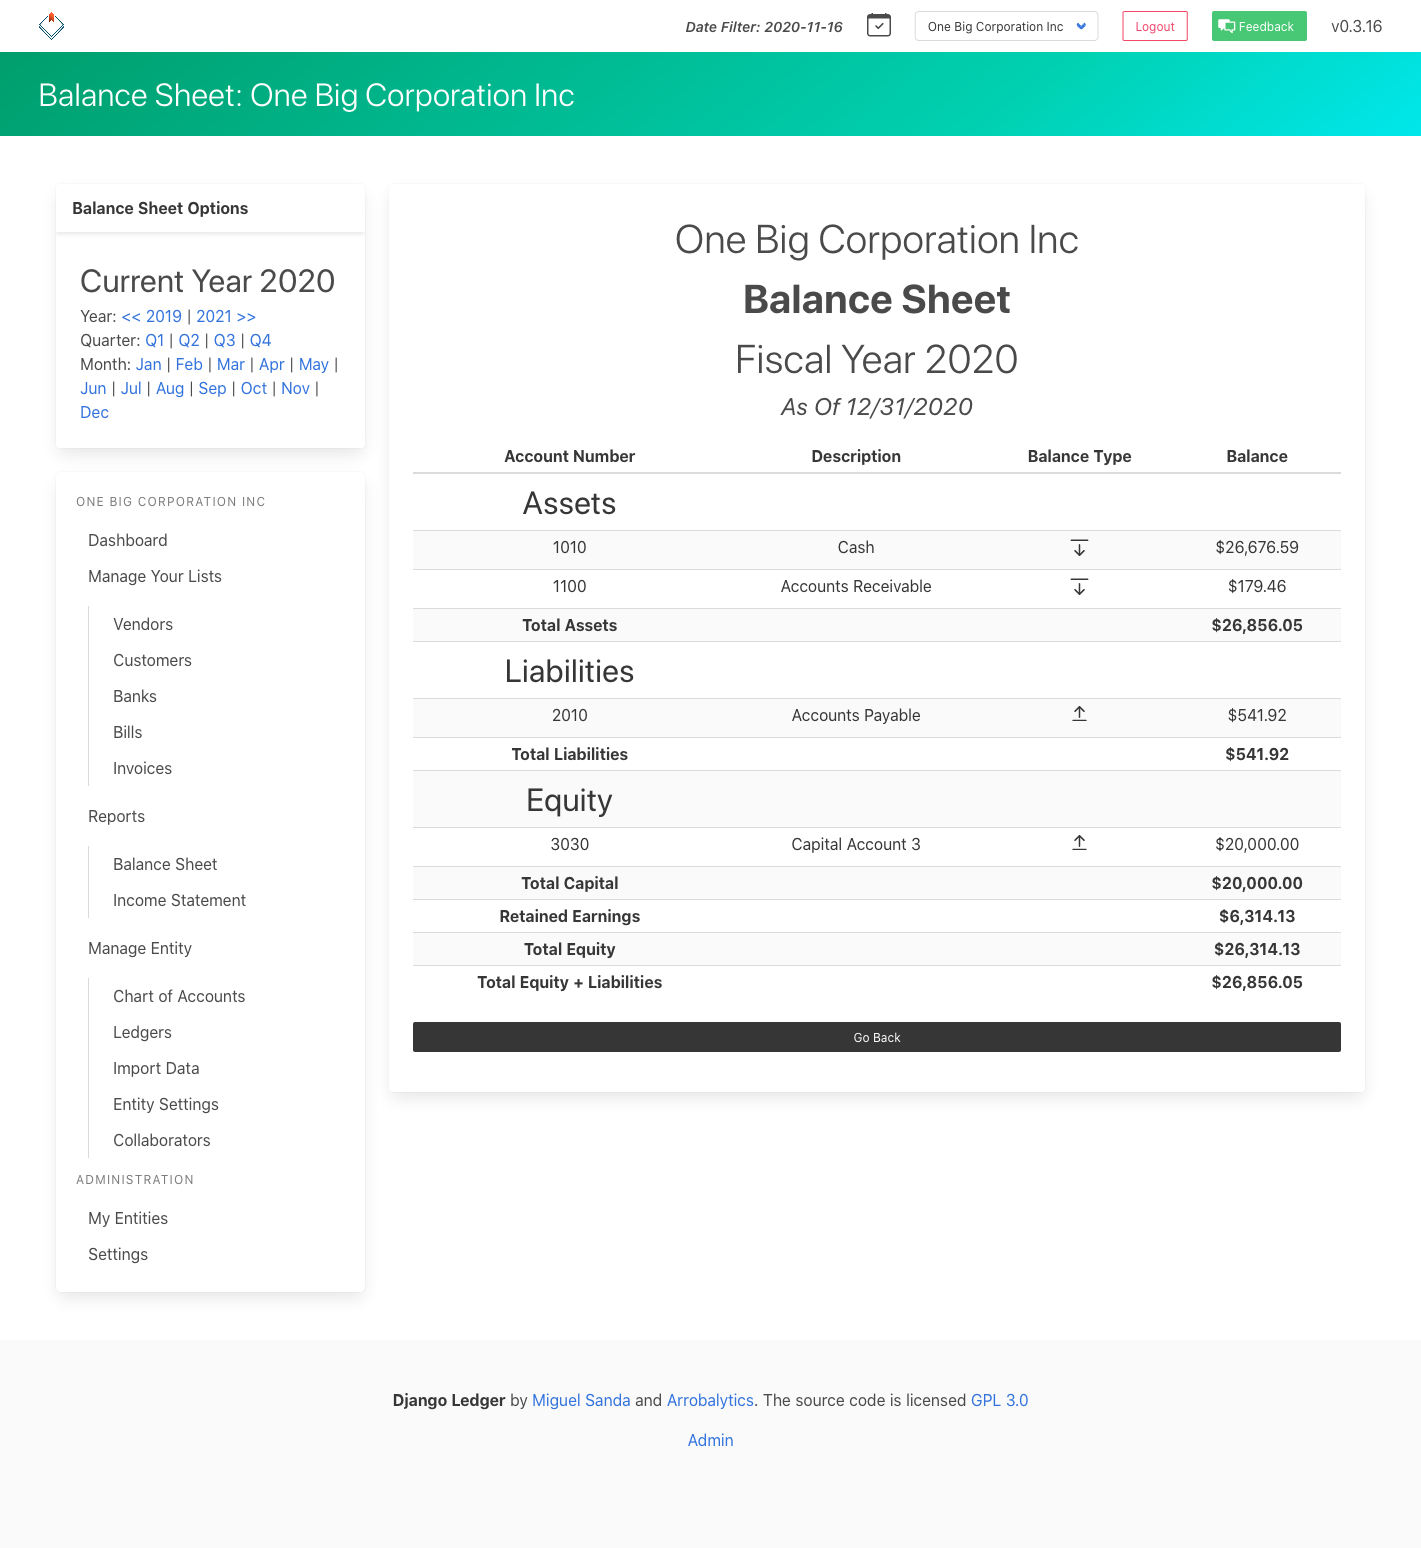


Financial Statements Screenshots


